FlowDino Documentation
Discover how to use all FlowDino features
📚 Menu Documentation
Article Management
Article Management
This page allows you to efficiently manage your articles: tag assignment, activation/deactivation, and deletion.
🔗 Quick Navigation
📍 Access
Menu: My Articles
🎨 Image generation with AI Virtual Model
When creating or editing an item, you can use AI to generate professional images with a virtual model or background change. This feature significantly enhances the visual quality of your listings.
📋 Access to the feature
In the create/edit item form, after adding your images, you will find the section "Generate or enhance your images with AI".
🔄 Available generation modes
🎨 Mode 1: With virtual mannequin
Ideal for: Fashion clothing and accessories only
Quota: Consumes 1 mannequin quota per generation
Processing: The AI automatically places the garment on a realistic virtual mannequin and generates a professional environment around it. The garment is extracted from your source image and adapted to the mannequin while preserving its characteristics (color, texture, shape).
4 available environments:
- 🎨 Professional plain background: Professional look, customizable color, marketplace style (perfect for e-commerce)
- 📸 Original background unchanged: Keeps the background of your photos with natural integration and authentic context
- 🏠 Indoor home: Warm indoor environment, casual/relaxed vibe, lifestyle
- 🍃 Natural outdoor: Natural light, sportswear, dynamic look
✨ Before/after example:
Before:
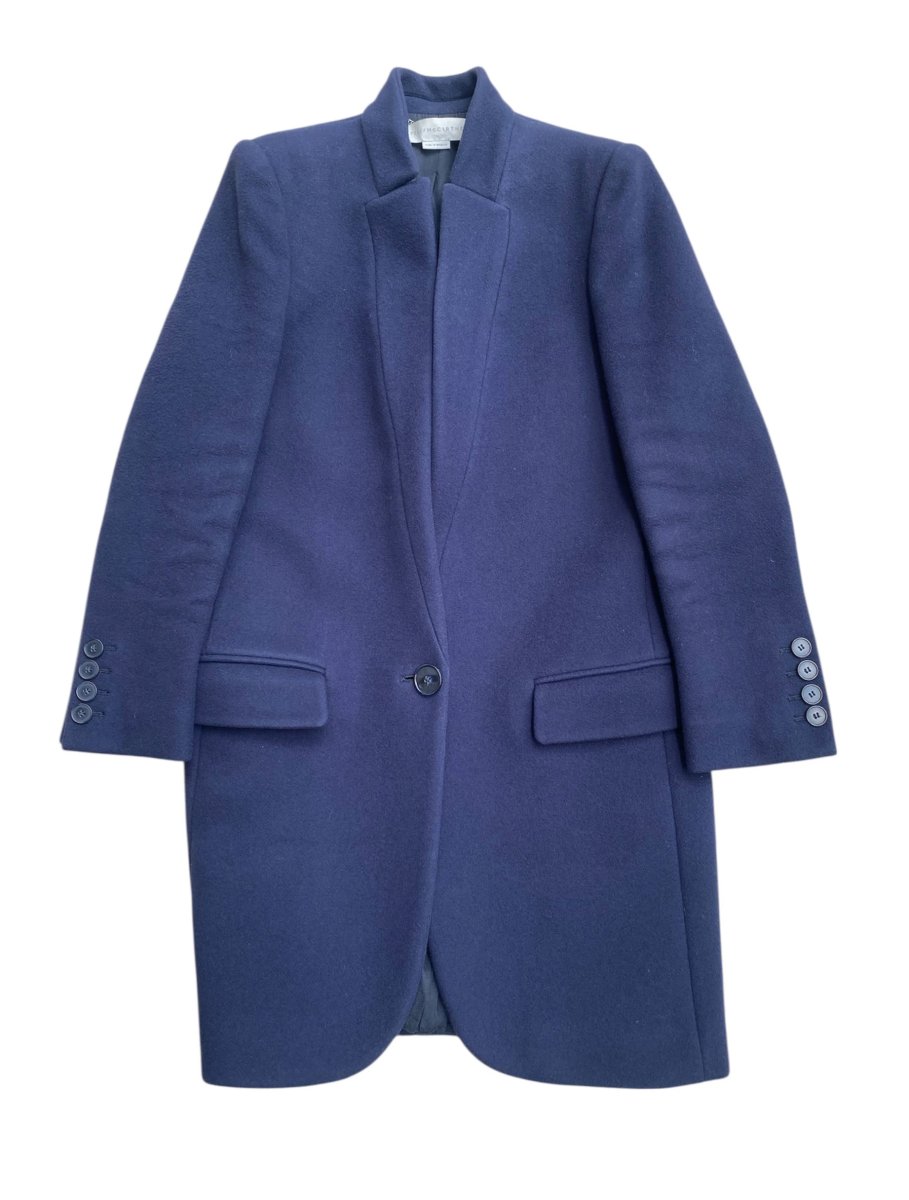
Photo of a blue jacket laid flat or on a hanger with any background
After:
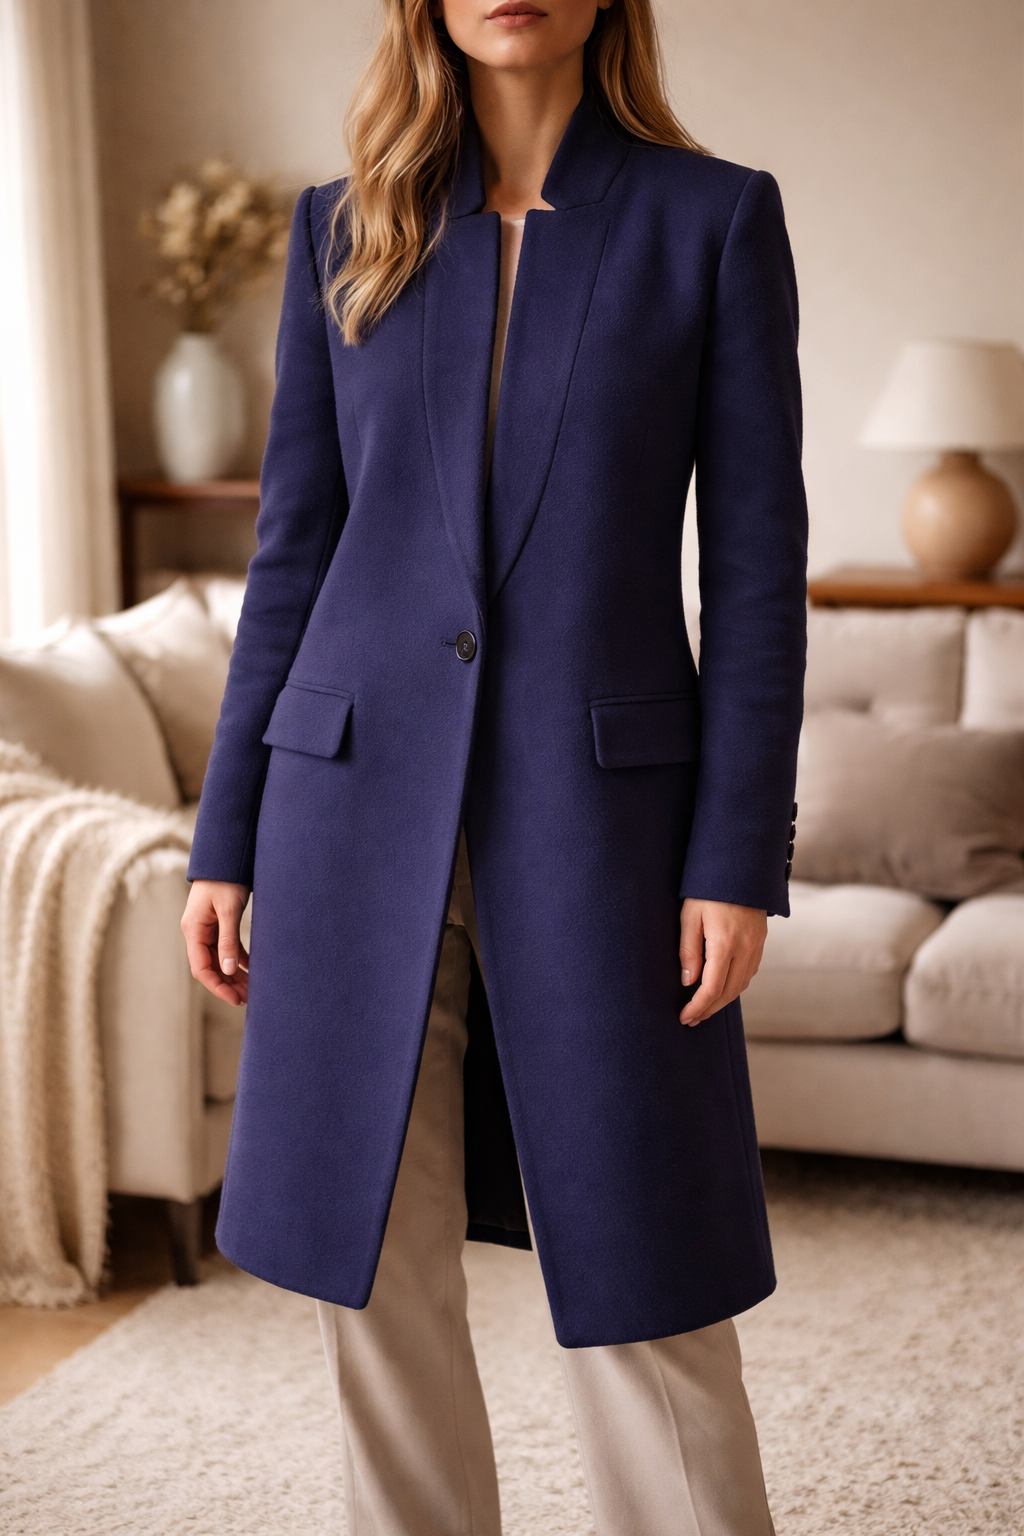
The jacket is worn by a realistic virtual mannequin in a natural outdoor environment, with professional staging. The mannequin wears the jacket naturally, in an elegant pose with optimal lighting.
📸 Mode 2: Background change only
Suitable for: All types of products (clothing, accessories, objects, electronics, etc.)
Quota: Consumes 1 background change quota per generation
Processing: The AI automatically detects your product, accurately cuts it out, and only replaces the background with a professional one. The product remains exactly as is (same position, same angle, same characteristics), only the background changes for a more professional rendering.
1 available environment:
- 📸 Professional solid background: Original background preserved with natural integration, customizable color, clean e-commerce style
✨ Before/after example:
Before:
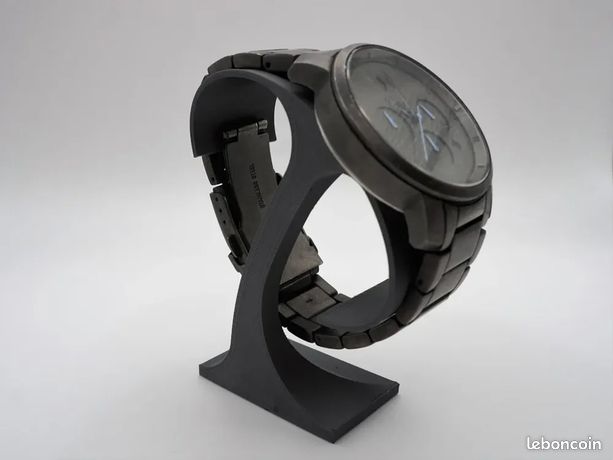
Photo of a watch placed on a table with a cluttered background (objects, visible mess)
After:
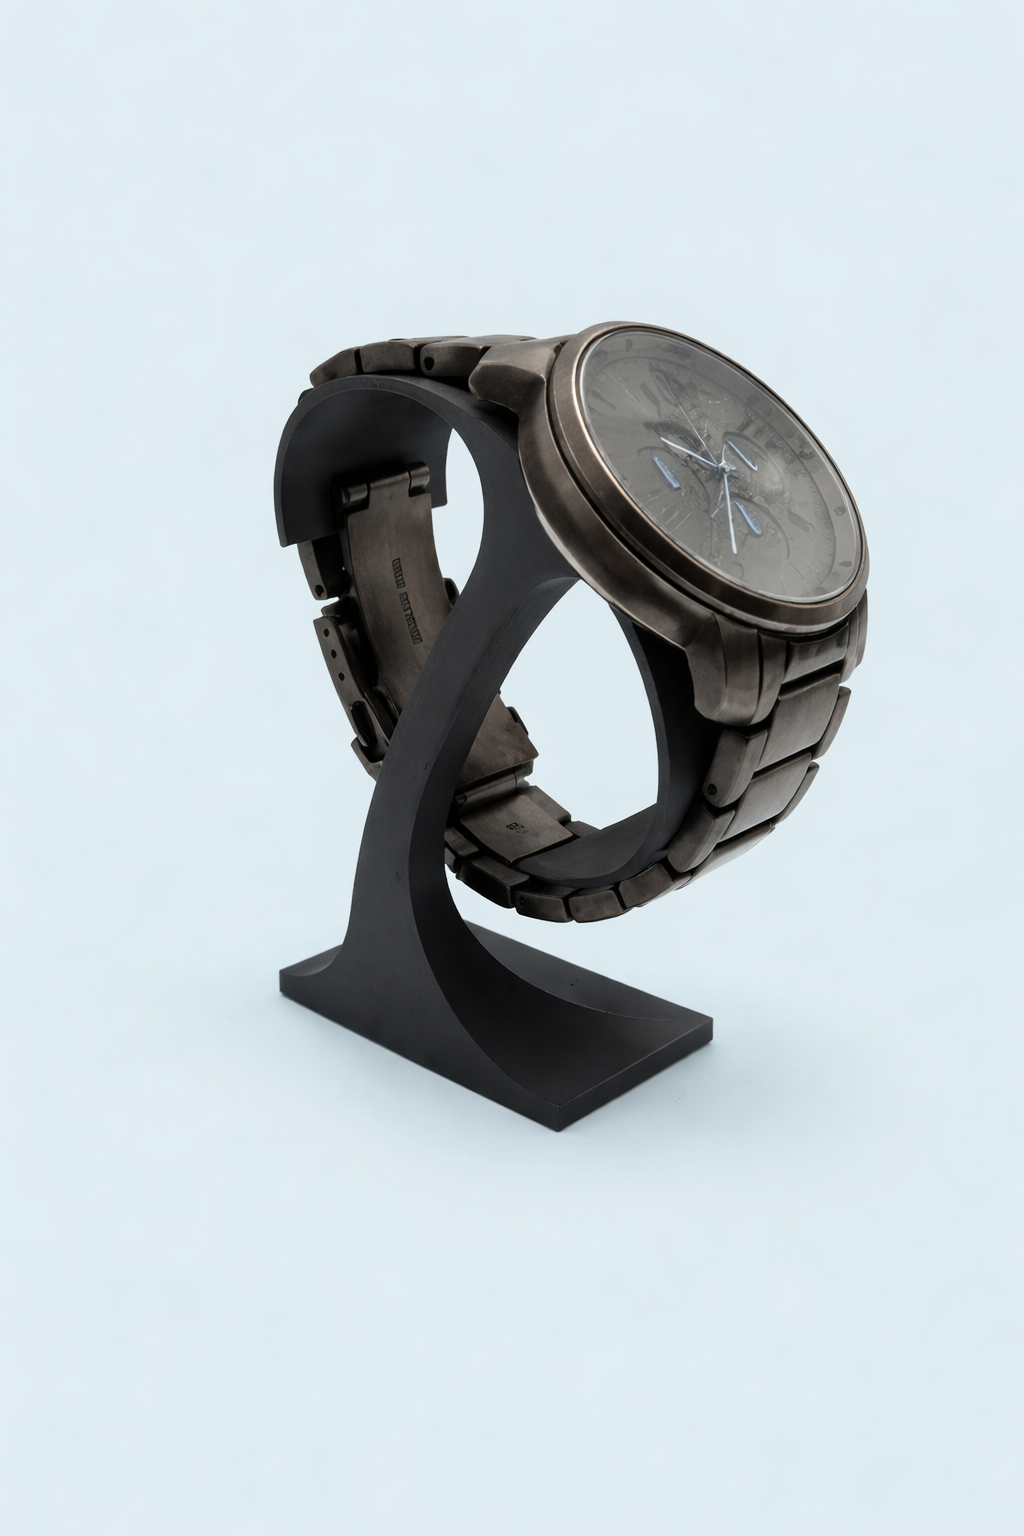
The same watch, in exactly the same position and angle, but with a professional solid white/gray background. The product is perfectly cut out and highlighted against a neutral background that emphasizes the object without visual distraction. The lighting is optimized for e-commerce rendering.
📝 Generation process
Source image selection
Click on one of your product images to select it as the source. The selected image will be marked with a blue badge "Source".
Generation mode selection
Choose between "With virtual mannequin" (clothing only) or "Background change only" (all products).
Remaining quotas are displayed in purple: for example, "3 quota(s) remaining".
Environment selection
Choose from the available environments based on the selected mode. Each environment displays its features with green checks ✅.
Image generation
The AI is processing your image. The process may take up to 2 minutes depending on complexity.
Result and save
The generated image appears with an orange badge "Image generated". You have two options:
- Green button "Keep this image" : Saves the image to your product
- Purple button "Edit with AI" : Allows for additional adjustments
💡 Recommendations for better results
- Image quality: Use sharp and well-lit images
- Framing: Prefer photos with the product clearly visible and centered
- Background: For the mannequin mode, a neutral background in the source image yields better results
- Product type: Model mode reserved for clothing, background change for all types
📊 Quota management
Remaining quotas are displayed on each generation mode card in a purple badge.
Display format: "X quota(s) remaining" where X is the number of available quotas.
If your quotas are exhausted, a link to the page /paid-options will allow you to refill.
⚠️ Limitations
- Processing may take up to 2 minutes depending on complexity
- Images that are too dark or blurry may yield less satisfactory results
- The model mode requires clearly identifiable clothing in the source image
💡 Tip
AI-generated images are automatically associated with your item upon saving. In creation mode, unassociated temporary images are automatically deleted after 24 hours.
✅ Article Activation
Activation makes an article visible and available for publishing on your sales sites. Only active articles can be selected for publications.
Why Activate an Article?
Activation is necessary to:
- Make the article available for publishing on sales platforms
- Include the article in automated processes (renewal, views, favorites)
- Allow article selection in the Chrome extension
Individual Activation
In the article list, click the 'Activate' button (checkmark icon) next to an inactive article. The article becomes immediately active and usable.
Bulk Activation
Select multiple inactive articles by checking their boxes
Click the 'Activate' button in the bulk actions bar
Confirm the operation. All selected articles will be activated simultaneously.
⏸️ Article Deactivation
Deactivation temporarily removes an article from circulation without deleting it. The article remains in your database but is no longer available for publications.
Why Deactivate an Article?
Deactivation is useful for:
- Pausing the sale of an article without permanently deleting it
- Temporarily removing an article from stock (out of stock, needs adjustments)
- Keeping an article in your catalog for future reuse
- Preventing an article from being published on sales sites
Individual Deactivation
In the article list, click the 'Deactivate' button (pause icon) next to an active article. The article immediately switches to inactive status.
Bulk Deactivation
Select multiple active articles by checking their boxes
Click the 'Deactivate' button in the bulk actions bar
Confirm the operation. All selected articles will be deactivated simultaneously.
Filter Inactive Articles
Use the 'Active' filter in the search bar and select 'Inactive only' to display all your deactivated articles.
🗑️ Article Deletion
Deletion permanently removes an article from your database. This action is irreversible.
⚠️ Warning
Once deleted, an article cannot be recovered. Make sure you really want to permanently delete the article before confirming the operation.
🚫 Deletion Restrictions
An article cannot be deleted if:
- The article has been published on one or more sales sites
- The article has received views
- The article has received favorites
💡 In these cases, you must first deactivate the article. Deactivation allows you to remove the article from circulation while preserving the history of publications, views, and favorites.
Individual Deletion
Access the article's detailed page
Click the 'Delete' button (trash icon) usually at the top right
Confirm deletion in the confirmation window. The article will be permanently deleted.
Bulk Deletion
In the article list, select articles to delete by checking their boxes
Click the 'Delete' button in the bulk actions bar
A confirmation window displays the number of articles to delete
Confirm deletion. All selected articles will be permanently deleted from the database.
Deletion Confirmation
To avoid accidental deletions, a confirmation window always appears before any deletion. Take time to verify the affected articles before confirming.
💡 Tips
- Use tags to organize your articles by collections, seasons, or any other criteria relevant to your business
- Prefer deactivation over deletion if you think you'll reuse the article later
- Bulk actions save a lot of time when managing a large catalog
- Use filters to precisely target articles to activate, deactivate, or delete
- Always check the number of selected articles before a bulk action to avoid mistakes